ASME B89.7.1 pdf download
ASME B89.7.1 pdf download Guidelines for Addressing Measurement Uncertainty in the Development and Application of ASME B89 Standards
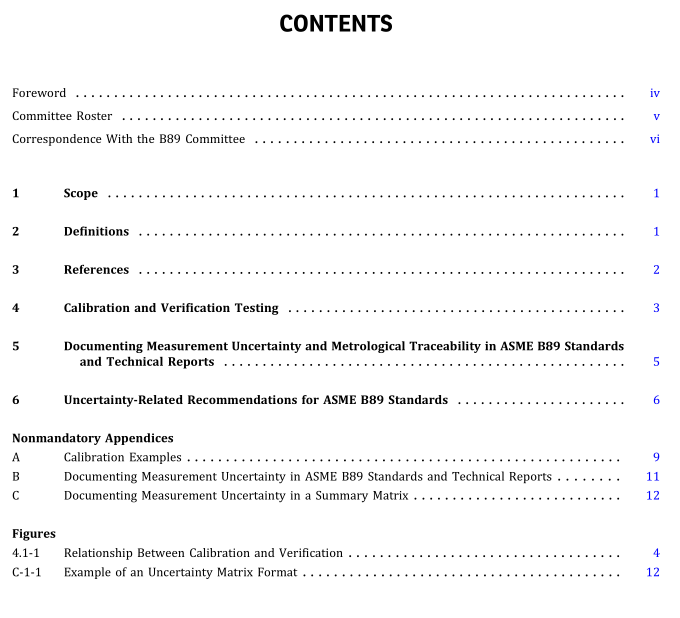
ThisTechnical Reportprovides recommendations associated with addressing measurement uncertainty anddirection in the application of the existing ASME B89.7series of uncertainty-related standards and technicareports.This Technical Report also provides general prin-ciples and recommendations regarding measurementuncertainty and its documentation for use in the development of ASME B89 standards and technical reportsThis Technical Report does not cover methods to beused in the estimation of measurement uncertainty. Toachieve these objectives, this Technical Report
(a) outlines guidelines for documenting measurementuncertainty in ASME B89 standards and technical reports(b) defines general calibration and verification testingprinciples, terms, and concepts for use in dimensionalmetrology
(c) discusses general topics associated with addressingmeasurement uncertainty, such as operating conditions,conformance testing, decision rules,and traceabilityThis Technical Report takes advantage of the technicalcontent developed in other ASME B89.7 standards andtechnical reports, whenever possible. That technicalcontent is referenced, but not repeated,in thisTechnical Report.
2 DEFINITIONS
For the purposes of this Technical Report, the definitions in JCGM 200:2012 (VIM3) apply; any differencesor additions are included below. When definitionsfrom JCGM 200 are included in this Technical Reportsome notes may not be shown for brevity. When noteshave been added to the JCGM 200 definitions in thisTechnical Report, a parenthetical statement indicatesthe notes are specific to this Technical Report
artifact verification: provision of sufficient objectiveevidence that a given material measure (artifact)conforms to a specified maximum permissible error ortolerance limit.
calibration:operation thatunderspecified conditions,in afirst step,establishes a relation between the quantityvalues with measurement uncertainties provided bymeasurement standards and corresponding indicationswith associated measurement uncertainties and,in asecond step, uses this information to establish a relationfor obtaining a measurement result from an indication.
(This definition is identical to JCGM 200:2012, definition2.39, but with the notes not shown for brevity. The notebelow is specific to this Technical Report.]NOTE: Verification tests arefrequently used as calibrations whenthey satisfy both the first and second step in the above definition(see para.4.4.2)
decision rule: documented rule that describes howmeasurement uncertainty will be accounted for withregard to accepting or rejecting an item, given a specifiedrequirement and the result of a measurement. (This definition isidenticaltoJCGM 106:2012,definition 3.3.12.Thenote below is specific to this Technical Report.]NOTE: See further discussion ofdecision rules in ASME B89.7.3.1
indication: quantity provided by a measuring instrumentor measuring system.
NOTES:
(1) An indication is often given as the position of a pointer for ananalog output or the displayed or printed number for adigital output.
(2) An indication is also known as a reading.
(The definition above, including the Notes, is identical toCGM 106:2012,definition 3.2.9.)
instrument verification: provision of sufficient objectiveevidence that a given indicating measuring instrumentconforms to a specified maximum permissible error ortolerance limit.
maximum permissible error(MPE):for a measuringinstru-ment, maximum difference, permitted by specifications orregulations, between the instrument indication and thequantity being measured.(This definition is identicalto JCGM 106:2012,definition 3.3.18, but with notes notshown for brevity. The note below is specific to thisTechnical Report.]
NOTE: A maximum permissible error is a specific type of tolerance limit
