ASME B16.4 pdf download
ASME B16.4 pdf download Gray Iron Threaded Fittings Classes 125 and 250
4 SIZE
4.1 Nominal Pipe Size As applied in this Standard, the use of the phrase “nominal pipe size” or the designation NPS followed by a dimensionless number is for the purpose of identi- fying the end connection of fittings. The number is not necessarily the same as the fitting inside diameter.
4.2 Reducing Fittings For reducing tees and crosses, the size of the largest run opening shall be given first, followed by the size of the opening at the opposite end of the run. Where the fitting is a tee, the size of the outlet is given last. Where the fitting is a cross, the largest side-outlet opening is the third dimension given, followed by the opposite opening. The straight-line sketches of Fig. 1 illustrate how the reducing fittings are read.
5 MARKING
(a) Each Class 125 fitting shall be marked for identifi- cation with the manufacturer’s name or trademark.
(b) Each Class 250 fitting shall be marked for identifi- cation with
(1) the manufacturer’s name or trademark
(2) the numerals “250” 6 MATERIAL Castings shall be produced to meet the requirements of ASTM A126, Class A, B, or C. The manufacturer shall be prepared to certify that the product has been so produced and that the chemical and physical properties thereof, as proved by test specimens, are equal to these requirements.
7 DIMENSIONS AND TOLERANCES
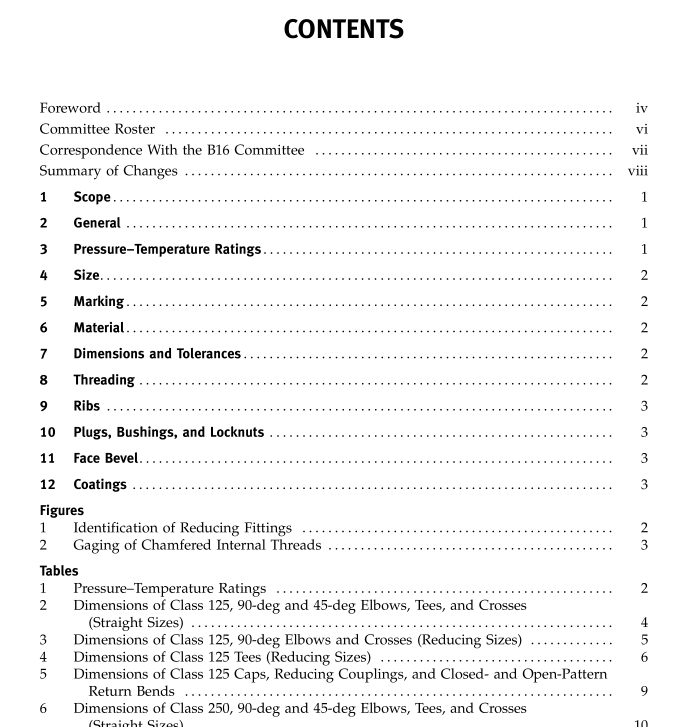
(a) Center-to-end dimensions in millimeters are given for standard straight and reducing fittings in Tables 2 through 6 (Tables I-2 through I-6 are in U.S. Customary units). The sketches of fittings shown in the Standard are representative and for the purpose of illustration.
(b) The dimensions in Tables 2 through 6 (Tables I-2 through I-6) of reducing fittings are for use only when making patterns for the specific reducing fitting in ques- tion and do not apply when a larger size pattern is bushed to make the reducing fitting wanted.
(c) The following tolerances shall be permitted: (1) Metal Thickness Tolerances. Metal thickness at no point in the castings shall be less than 90% of the value given in Tables 2 through 6 (Tables I-2 through I-6).
(2) Center-to-End Tolerances. Permitted tolerances onthecenter-to-end dimensionsofthe fittings are shown inTables 7and I-7. Tolerances for end-to-end dimensions and lengths of couplings and reducers shall be twice those given. The largest opening in a reducing fitting governs the tolerances to be applied to all openings. These tolerances do not apply to return bends and caps. 8 THREADING
(a) All fittings shall be threaded according to ANSI/ASME B1.20.1, and the variations in threading shall be limited to one turn large or one turn small from the gaging notch on the plug when using working gages.
(b) The reference point for gaging internal fittings threads depends upon the chamfer diameter. When the
